Seeing a pretty wreath hanging on my front door always put a smile on my face. Who doesn’t? Ok, maybe it’s just me (Confession: I am pretty obsessed about wreaths. I like to take pictures of pretty ones whenever/wherever I see one. Not creepy at all, I know). Personally I think accessorizing your front door is important. It makes the house looks more homie, welcoming and polished. It’s also a great conversation starter. “Oh! I love your wreath! Where did you get it?” In my head everyone does this.
After I took down the Christmas wreath, my front door was looking kind of sad and cold. A Valentine’s Day wreath was in order. I was inspired by some beautiful wreaths (here, here, here, and here).
My original thought was to create a heart shaped wreath using non-traditional Valentine’s Day colors like gray, wintry white and neutral. My front door is a not so appealing maroon-ish brick red with a dark brown under tone (ew, I know). It came with the house. I wasn’t sure how red would look against this background. But when I organized my Christmas décor, I found a lot of left over pink and red felt from various projects. I really wanted to use what I had on hand. So I decided to use traditional Valentine’s Day colors and a square shape. And the result looked like this…
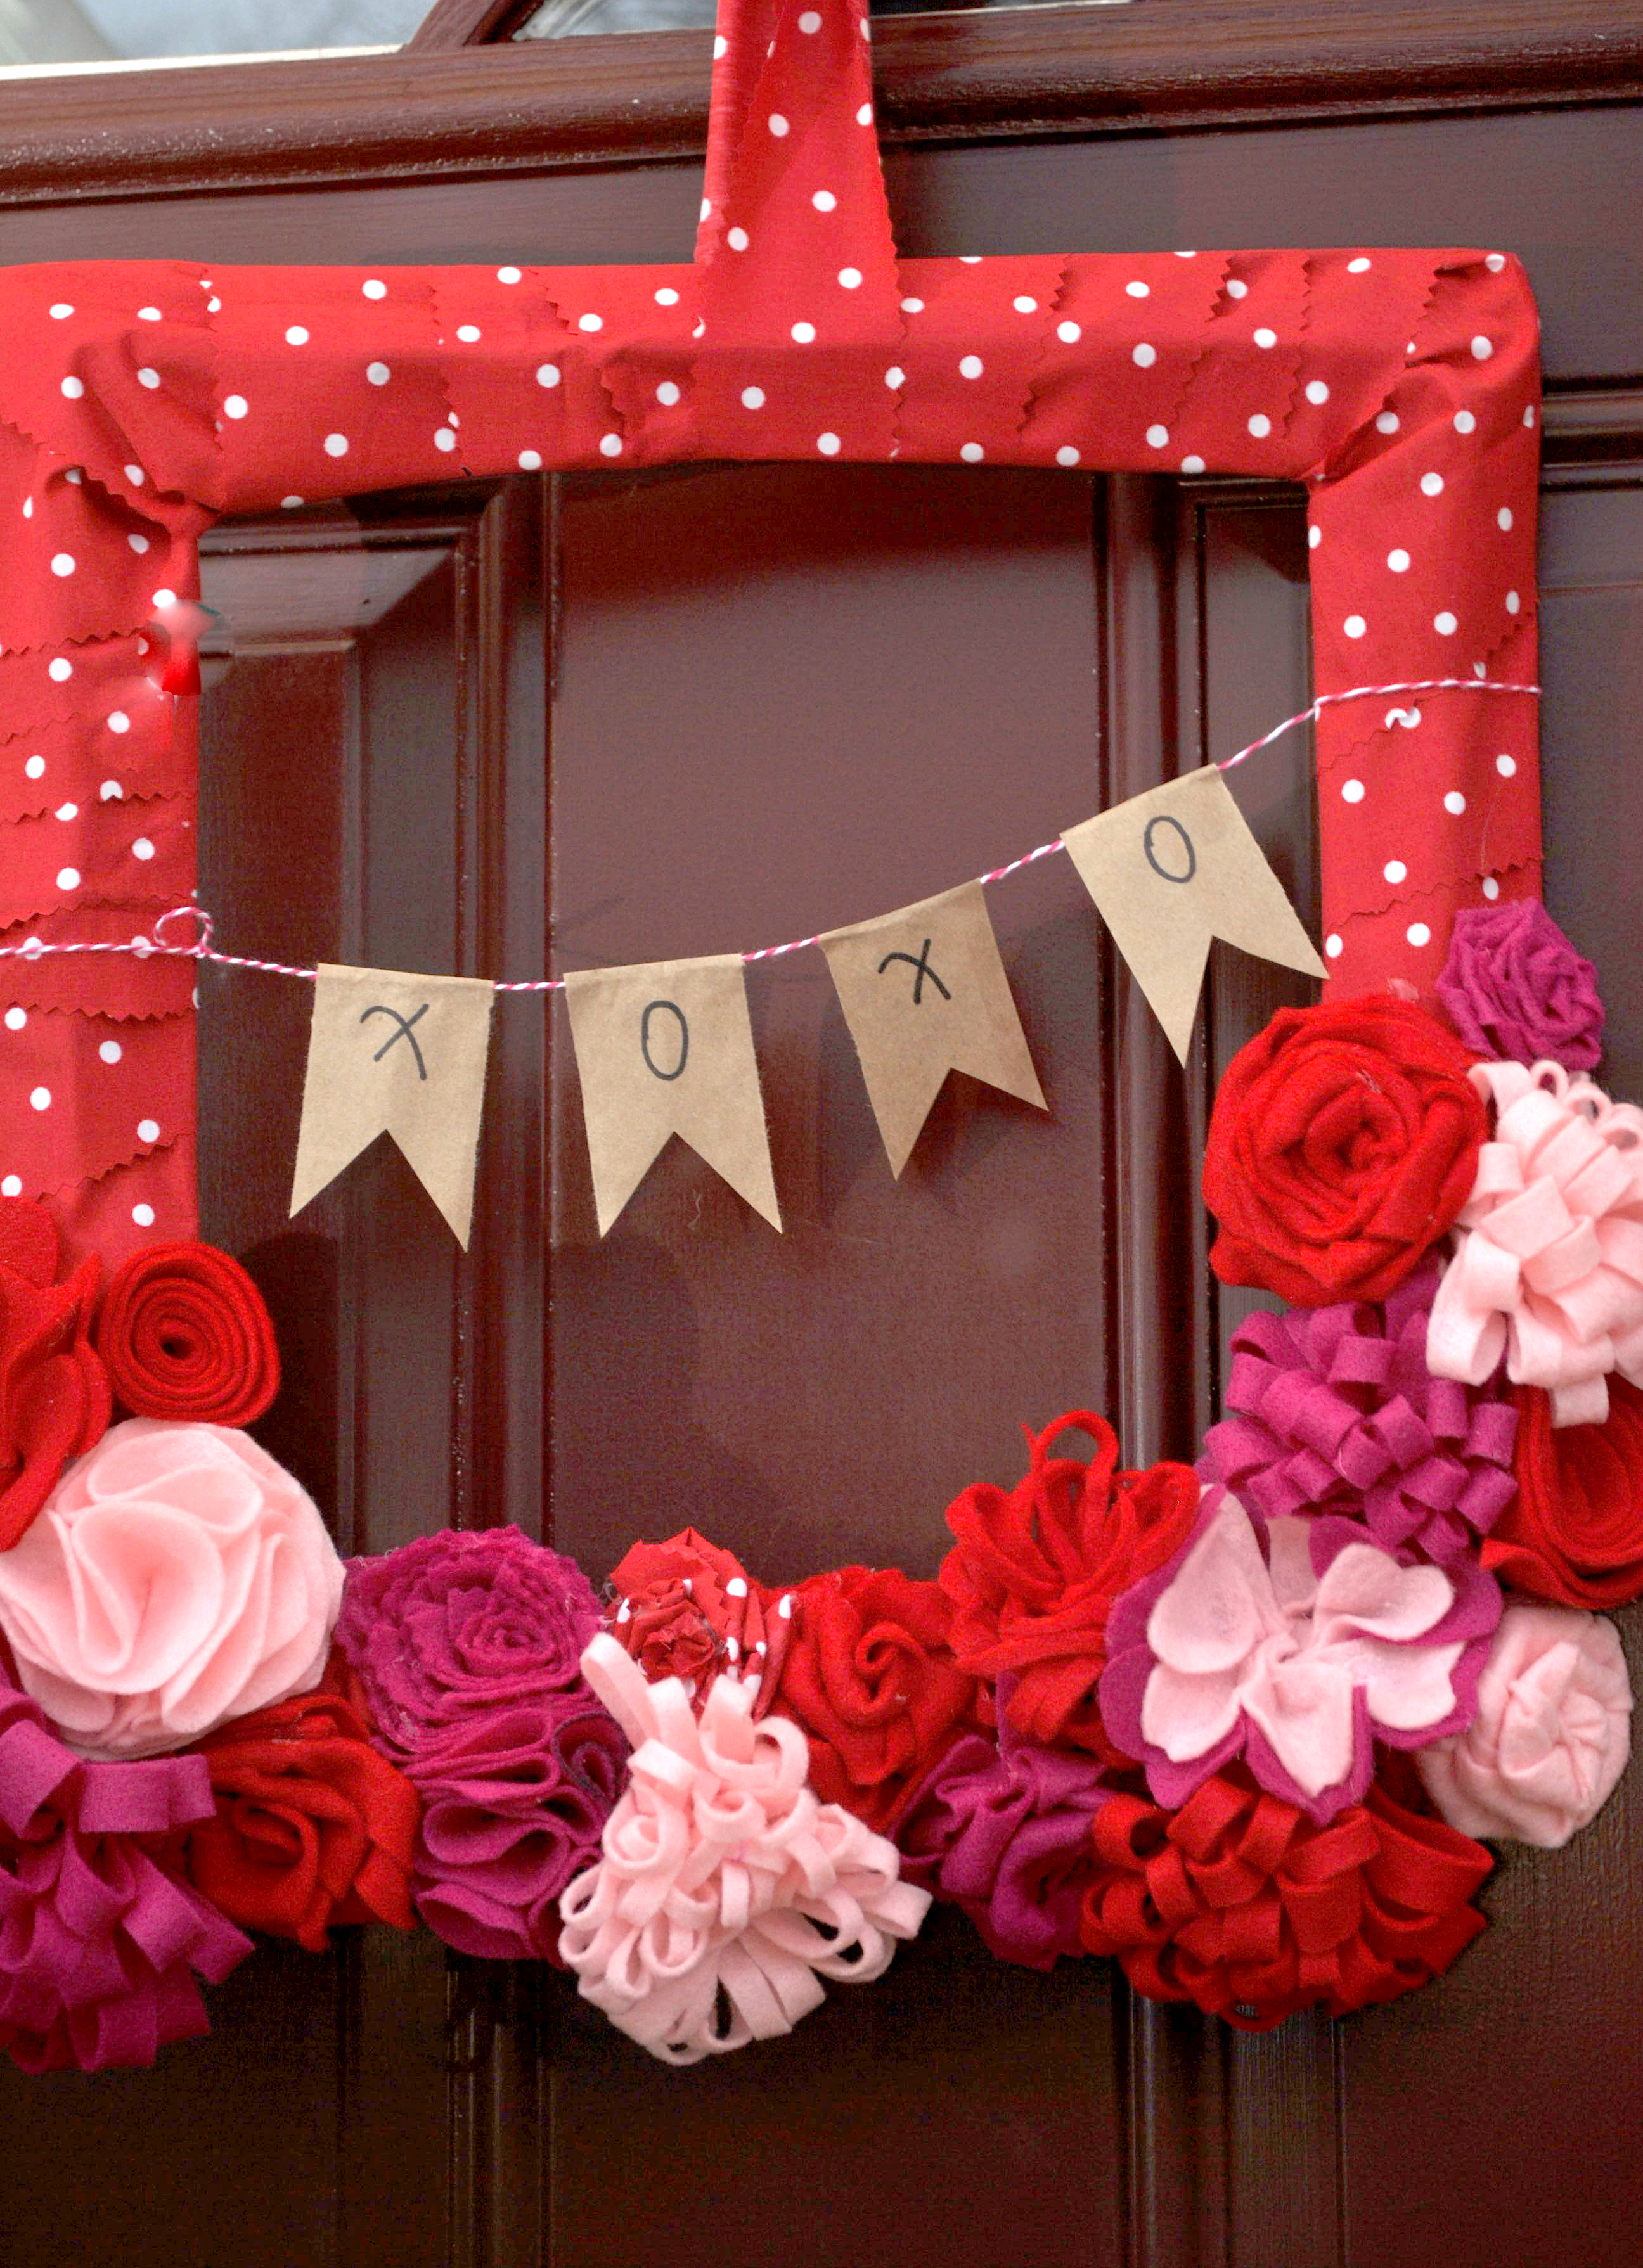


I actually don’t mind the red against the maroon door. When I started the project, the plan was to make enough flowers to cover the entire the wreath. Half way through, I carefully thought about my design AKA I got tired of making felt flowers so I decided to only cover the bottom half. I made a tiny banner to balance out the top. The most time consuming part was making the flowers, but you can save time by using pre-made fabric flowers (cute ones at bridal section of any craft store) or silk flowers. It’s simple to make and versatile enough that you can change the colors for spring or Easter.
Here is what you will need:
- square wire wreath (got mine from Joann’s floral department)
- 2” ribbon (I cut strips from my left over polka dot fabric)
- felt:1/4 yard of each color would be plenty (I used red, light pink and magenta)
- hot glue (your BFF for this craft)
- scissors (I also used pinking sheers)
- yarn , string or baker’s twine
- pins
- brown paper bag
Here is what you will do:
1. You can skip this step if you are using ribbon. Cut your fabric into 2” strips. This doesn’t have to be exact since you’ll be overlapping as you wrap around anyway. I used pinking sheers to create a more finished edge and prevent fraying.
2. Wrap your ribbon or fabric around the wire wreath. I used hot glue to secure the fabric to the wreath and each other. The corners can be a bit tricky. I went over each one a couple of times making sure no wire was showing.
3. Make some felt flowers. I found some helpful tutorials here, here and here. Some of these suggested to sew but after I formed the flowers I secured them with pins, then used hot glue to adhere instead. I also got “creative” with my pinking sheers and cut out some small strips and hearts then tszuj-ed (zhuzh-ed?) them into flowers.


4. Hot glue the flowers onto the ribbon wrapped wreath. I didn’t arrange the flowers in any particular pattern. I just went with what looked good to me and filled in the holes with smaller ones.
5. To make the tiny banner, cut 4 small rectangles from the brown paper bag (the size should be proportional to your wreath, my rectangles were 2″x3″). Gently fold in half, try not to make a harsh crease. Trim the bottom like you would with the ends of a ribbon. Fold a tiny bit of the top edge then glue or tape it to a piece of baker’s twine. Lastly tie your mini banner to the sides of the wreath. Et voila!

I hope you love wreaths as much as we do because there will be many more tutorials about them. Have you created anything to dress up your front door lately?

