Posts Tagged ‘natural’

Moss Covered Letter

Here’s another craft that I made for the bride-to-be at her shower. After the vintage garden theme was settled, I knew right away that I had to make a moss covered letter. It was the perfect fit for the theme of the shower and could also serve as home décor for the bride and groom in their new house!

Moss Covered Letter

What you need:

  • 1/4” plywood—I used leftover from my Berry T Wreath and Moss Shamrock crafts
  • Letter on paper (font of your choice)
  • Jigsaw
  • Sandpaper
  • Spray Paint- optional
  • Moss—I used sheet moss found at any craft store
  • Glue Gun
  • Burlap/ribbon

Step 1:

Choose a font for your letter. Again, since we have access to the LCD projectors at school, I used that to trace my letter onto paper. No LCD projector? Print out your letter on two pieces of paper and tape them together. Trace your letter onto your wood.

Note- I was working with a remnant piece of wood, so it was already cut into a square shape that was close to the border of my letter. You don’t want too much excess wood getting in your way as you cut.


Step 2:

Cut out your letter using the jigsaw. Use some sandpaper to smooth out the edges.


Step 3:

As with my other wood crafts, I decided to spray paint my letter in green. The moss won’t cover the sides of the letter and I wanted the wood to match.

Moss Covered Letter

Step 4:

Trace your letter onto the back of your moss sheet and carefully cut it out.

Moss Covered Letter3

Step 5:

Using your glue gun, apply your moss. Make sure you have newspaper or toweling down to catch the many pieces of shedding moss.

moss covered letter

Step 6:

Tie burlap or whatever ribbon you choose around the letter and it’s ready to hang. I think this looked just awesome on a mirror at the bridal shower.

Moss Covered Letter
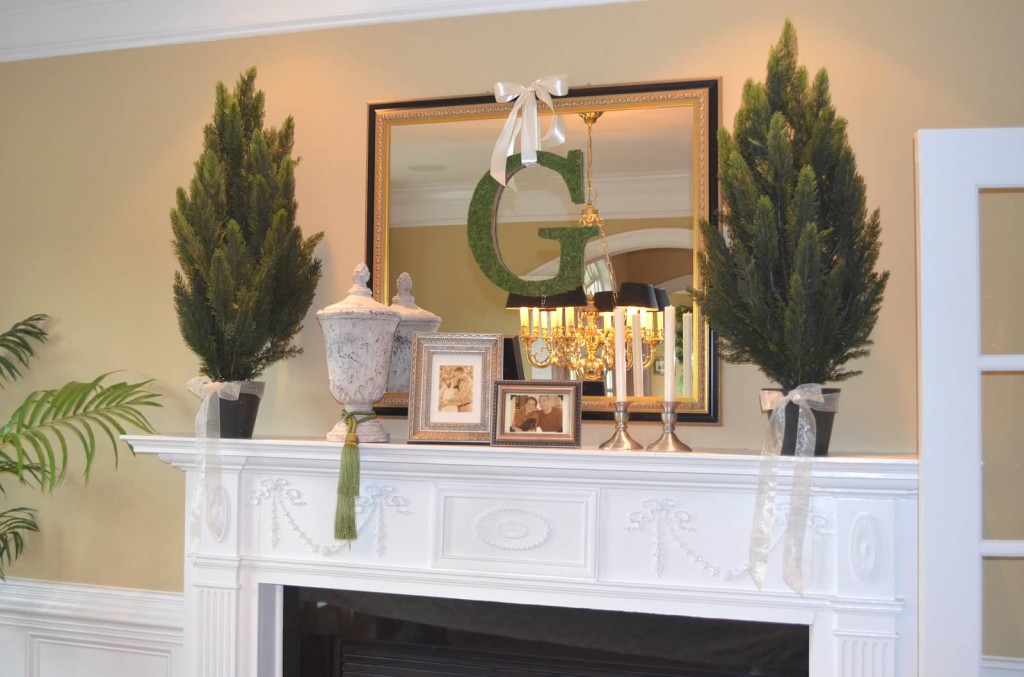
This is a great craft for yourself or even as a gift!


Aging Terracotta Pots

This past weekend, my mother in-law hosted a bridal shower for our cousin Justine. My mother-in-law is truly the ‘hostess with the mostess’—her gatherings are always impeccable!

The theme of the bridal shower is vintage garden—think burlap, rustic, and natural. Each guest will receive a potted herb for her favor—which is where crafting comes into play!

Here’s the method we used to get a faux aged look for our terracotta pots.pots 5


What you need:

Terracotta Pots and bases- ours were 4 inches

Rustoleum American Accents Stone Spray Paint

Green craft paint- in a hue of your choice

Foam brush

Sandpaper—we used the ones that look like a block/sponge

Newspaper/dropcloth for your spraying surface


Step 1:

Lay out your pots in an arrangement that is conducive to spraying. We had over 40 pots and bases!

Step 2:

Spray your heart out. The stone spray paint was really cool—very textured and it adhered to the pot quite well. Don’t cover every inch—remember in the end you want it to look like it has aged naturally.

Just a light spray will do. Let dry completely.

pots 2

Step 3:

Using your foam brush, apply green paint on top of the spray paint. Again, do this sparingly. Don’t make it look perfect!

aged terracotta pots

Step 4:

Stretch out those hand muscles a bit, because you’ll need them for the sanding! Sand each pot until the surface is smooth. We found that using a circular motion helped to blend the green and white a bit better. For a more distressed look, press a bit harder on the sandpaper so the clay pot itself shows through more.

  pots 6

     So far so good! Look for the finished product with potted herbs in the Bridal Shower post.


Jute Cross Wall Art

In the weeks leading up to Easter, I’d wanted to make something that showcased a cross. It’s always nice to have a few Easter-specific decorations to add to the overall spring décor.

I’ve liked the look of the nail art that took Pinterest by storm earlier this year. You’ve probably seen it; usually it’s a state outline such as this one. Given its materials, to me, this would be the perfect means for my Easter cross.

I chose to work with jute for this project (I’ve got tons left over from my wrapped Easter eggs). I’m sure you could use twine, yarn, or string as well.

Jute Cross

What you need:

Wood- we have plenty of remnants from which to choose

Fine grit sandpaper

Circular Saw- if you need to cut your wood

Stain or paint

Stain rag or paintbrush

Clear finish- I used some that we had on hand

Nails

Hammer

Jute


Step 1:

Using a circular saw cut your wood down to the size/shape you want it to be. I settled on a good old fashioned rectangle. This will be leaning against a wall on a shelf, so I didn’t make it that large, only 10.5 x 13. Give your wood a quick sand to ensure there are no jagged pieces anywhere.

Step 2:

Stain or paint your wood. I wanted to keep the natural look of the wood so I decided on stain. I’ve used Minwax before and was happy with the results—this time I went with the color Provincial. Follow the directions on your stain can to make sure you use the correct procedure. After your stain dries, apply a coat of finish. Let dry completely- I decided to let it dry overnight and pick up with the rest of the project the next day.

Step 3:

I did a quick sketch of my cross on paper so I could choose the shape/size I wanted it to be. I also made sure to decide on where I wanted my nails to go. I settled with only doing nails in the corners of the cross—quite different from the state nail art that uses tons of nails.

Step 4:

Lay your sketch on top of your wood. You could just hammer in your nails where you want them to go, and when finished, tear away your paper. However, I chose to use an awl to mark where my nails would go. I then took off the paper and got to hammering. Remember not to nail them all the way down—you need to have nail exposed to wrap the jute around!

jutecross photos

Step 5:

Now that you have your outline/nails in place, start wrapping. Make sure you tie a knot around your first and last nails so it doesn’t unravel. I chose to keep my wrapping to a minimum because I wanted this design to be simplistic and not too “perfect” looking.

jute cross

      I’m quite happy with how this came out. It’s a nice nod to the meaning behind the holiday.


1 2 3