Posts Tagged ‘Tutorial’

Aging Terracotta Pots

This past weekend, my mother in-law hosted a bridal shower for our cousin Justine. My mother-in-law is truly the ‘hostess with the mostess’—her gatherings are always impeccable!

The theme of the bridal shower is vintage garden—think burlap, rustic, and natural. Each guest will receive a potted herb for her favor—which is where crafting comes into play!

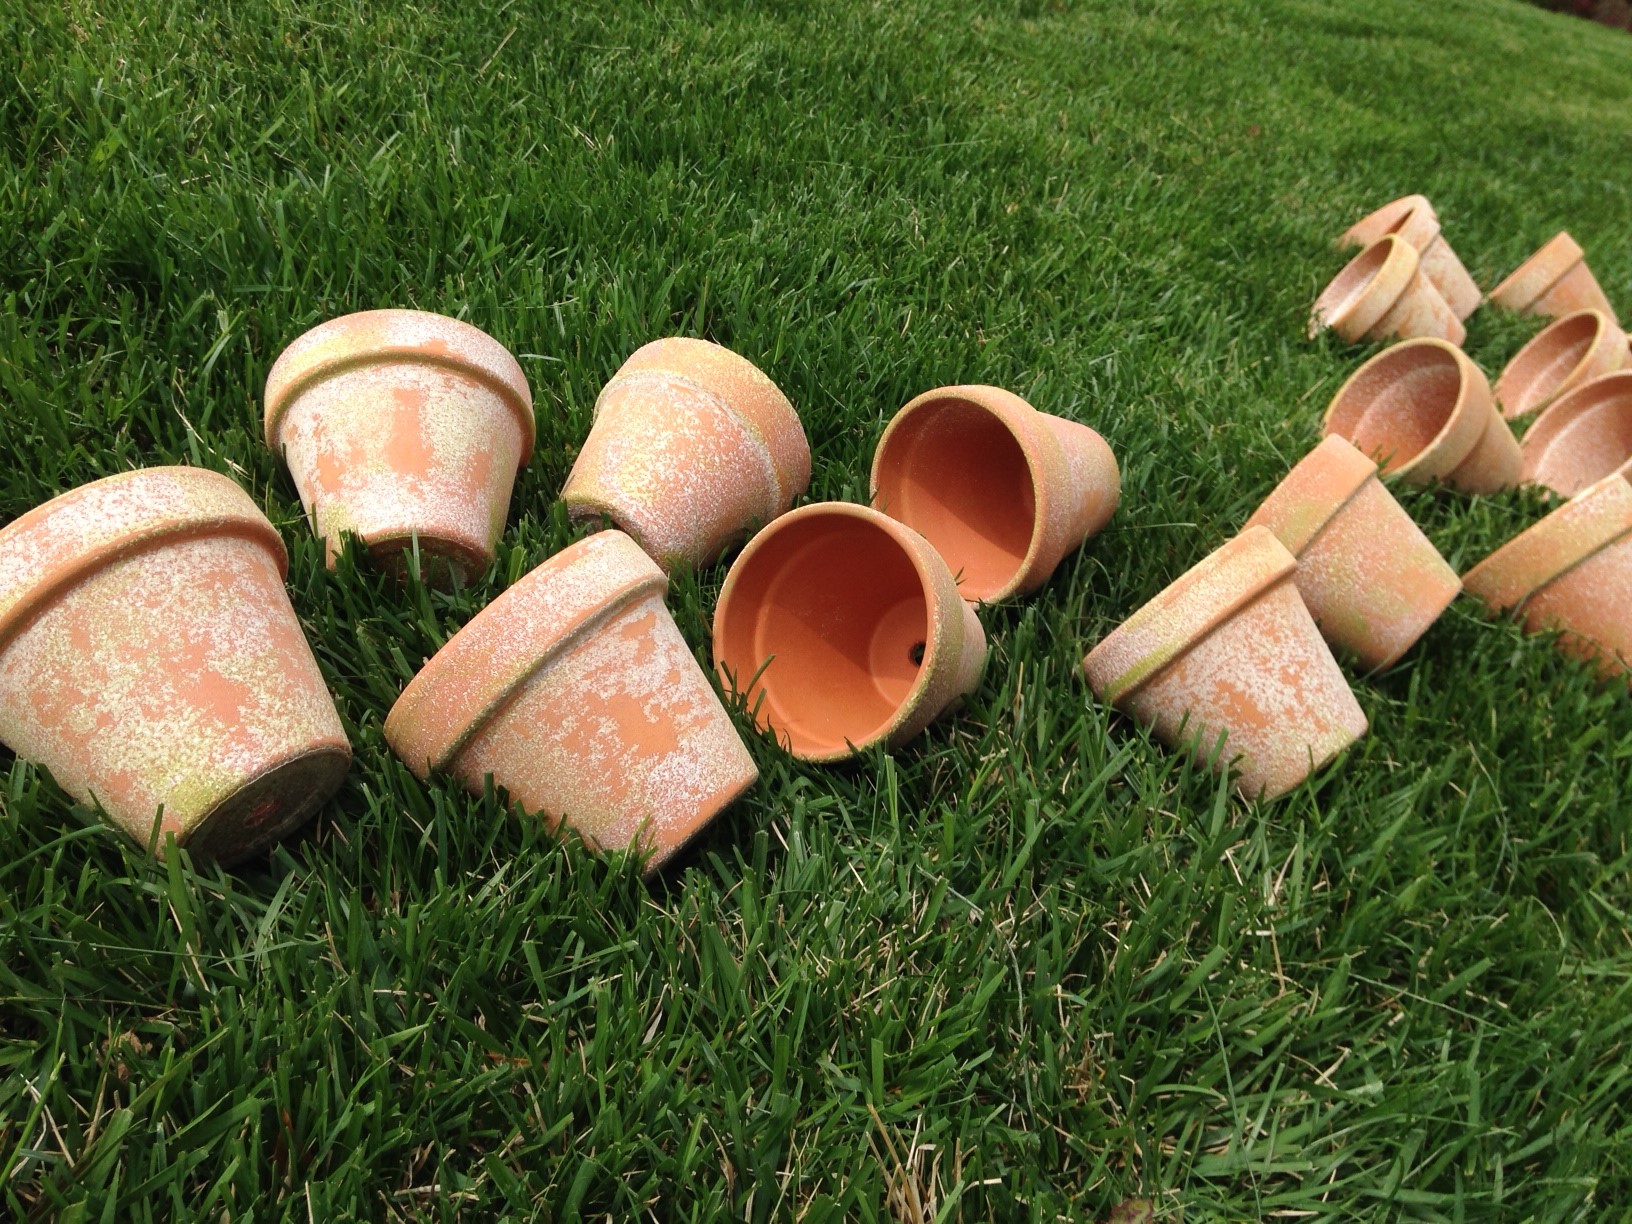
Here’s the method we used to get a faux aged look for our terracotta pots.pots 5


What you need:

Terracotta Pots and bases- ours were 4 inches

Rustoleum American Accents Stone Spray Paint

Green craft paint- in a hue of your choice

Foam brush

Sandpaper—we used the ones that look like a block/sponge

Newspaper/dropcloth for your spraying surface


Step 1:

Lay out your pots in an arrangement that is conducive to spraying. We had over 40 pots and bases!

Step 2:

Spray your heart out. The stone spray paint was really cool—very textured and it adhered to the pot quite well. Don’t cover every inch—remember in the end you want it to look like it has aged naturally.

Just a light spray will do. Let dry completely.

pots 2

Step 3:

Using your foam brush, apply green paint on top of the spray paint. Again, do this sparingly. Don’t make it look perfect!

aged terracotta pots

Step 4:

Stretch out those hand muscles a bit, because you’ll need them for the sanding! Sand each pot until the surface is smooth. We found that using a circular motion helped to blend the green and white a bit better. For a more distressed look, press a bit harder on the sandpaper so the clay pot itself shows through more.

  pots 6

     So far so good! Look for the finished product with potted herbs in the Bridal Shower post.


Jute Cross Wall Art

In the weeks leading up to Easter, I’d wanted to make something that showcased a cross. It’s always nice to have a few Easter-specific decorations to add to the overall spring décor.

I’ve liked the look of the nail art that took Pinterest by storm earlier this year. You’ve probably seen it; usually it’s a state outline such as this one. Given its materials, to me, this would be the perfect means for my Easter cross.

I chose to work with jute for this project (I’ve got tons left over from my wrapped Easter eggs). I’m sure you could use twine, yarn, or string as well.

Jute Cross

What you need:

Wood- we have plenty of remnants from which to choose

Fine grit sandpaper

Circular Saw- if you need to cut your wood

Stain or paint

Stain rag or paintbrush

Clear finish- I used some that we had on hand

Nails

Hammer

Jute


Step 1:

Using a circular saw cut your wood down to the size/shape you want it to be. I settled on a good old fashioned rectangle. This will be leaning against a wall on a shelf, so I didn’t make it that large, only 10.5 x 13. Give your wood a quick sand to ensure there are no jagged pieces anywhere.

Step 2:

Stain or paint your wood. I wanted to keep the natural look of the wood so I decided on stain. I’ve used Minwax before and was happy with the results—this time I went with the color Provincial. Follow the directions on your stain can to make sure you use the correct procedure. After your stain dries, apply a coat of finish. Let dry completely- I decided to let it dry overnight and pick up with the rest of the project the next day.

Step 3:

I did a quick sketch of my cross on paper so I could choose the shape/size I wanted it to be. I also made sure to decide on where I wanted my nails to go. I settled with only doing nails in the corners of the cross—quite different from the state nail art that uses tons of nails.

Step 4:

Lay your sketch on top of your wood. You could just hammer in your nails where you want them to go, and when finished, tear away your paper. However, I chose to use an awl to mark where my nails would go. I then took off the paper and got to hammering. Remember not to nail them all the way down—you need to have nail exposed to wrap the jute around!

jutecross photos

Step 5:

Now that you have your outline/nails in place, start wrapping. Make sure you tie a knot around your first and last nails so it doesn’t unravel. I chose to keep my wrapping to a minimum because I wanted this design to be simplistic and not too “perfect” looking.

jute cross

      I’m quite happy with how this came out. It’s a nice nod to the meaning behind the holiday.


Spring Door Decor

Spring Door Decor

As seasons change and I focus on changing up the décor inside my house, I’m sure not to neglect the exterior as well. You might have noticed Rona, Grace, and I have a thing for wreaths (Valentine’s, Berry Letter, Burlap Bubble, Boxwood Bunny). I’m sure there will be many more to come, but here’s another piece of spring door decor to add to the list.

For spring I wanted to get some floral action going on the front door. One day I was checking out HGTV’s website and found this lovely creation (although those colors are a bit more early fall to me than spring). I hit up my favorite crafting stores and set out to make my own version. There aren’t any instructions for this craft because it’s really just your basic flower arrangement.

What you need:

  • Basket
  • Flowers/greens of your choice
  • Foam
  • Ribbon of your choice

Choose a basic layout/pattern for your blooms and cut the stems down to size. I chose to stick a piece of floral foam in the bottom of my basket so my stems wouldn’t wobble around.

Spring Door Decor 2 Interesting how a just a few flowers and a basket can make such a cute decoration.

Perfect for the spring!

1 2 3 4 5 6