Archive of ‘Home Decor’ category

Painted Barstools

One of my favorite parts of our kitchen is the island. Now that I have one, I cannot imagine a future kitchen without one (or at least a peninsula of some sort). For the first year that we lived in our house, we found ourselves standing around the island a lot—island seating wasn’t high on our “fixer upper” priority list. During year two, it was time to take some action.

We knew we wanted barstools without a back. We loved the saddle stools at Pottery Barn but weren’t as in love with the hefty price tag. After looking around, we only found stools in colors that weren’t our top choices. It became clear that we should just paint some stools ourselves.

painted barstools

What you need:

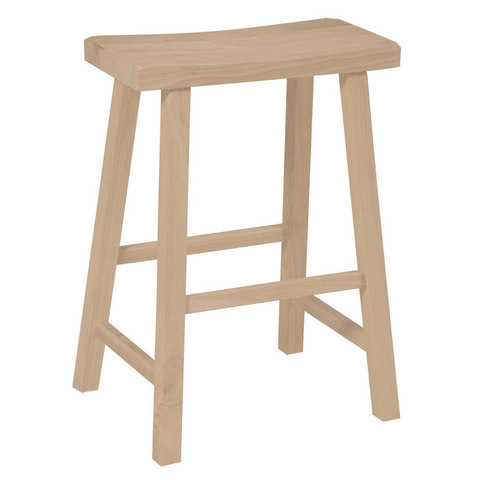
Unfinished Wood Barstools—we scored two online for $50

Fine Sandpaper

Primer

Paint

Foam brush

Protective Top Coat

Plastic Covering and Painter’s Tape- only needed if you are doing a two-toned stool

Stain/Stain Rag- only needed if you are doing a two-toned stool


Step 1:

As your stools are unfinished, they should be pretty smooth and free of splintering wood. Give your stools a super light and casual sanding—just in case. We wanted a two-toned stool—wood stain on the seat and paint on the legs. Because of this, I used painter’s tape to cover up the saddle seat with part of a plastic drop cloth. Make sure it’s covered all the way so no primer gets through!

Barstool, unfinished Step 2:

Prime your stools (or, like in my case just prime the legs). For the first time ever, I used a spray primer. The spray primer went on great—very easy to use. Follow the directions on your primer can to ensure correct application. Let dry completely.

Step 3:

While my seat was still wrapped up, I painted the legs of my stool. I applied two coats of paint using a small foam brush. Let dry completely.

primed barstools

You can see the one stool has been painted, while the other one is primed and ready for some color. Pardon the mess!

Step 4:

With the stool legs completely painted and dry, I removed the plastic covering from the saddle seat. I wanted to stain the top of the seat a color that would closest match our hardwood floors. Minwax’s Natural color did the job. Follow the direction on the stain can for the correct application procedure. I did two coats of stain.

Step 5:

Apply your finish/top coat. Again, we went with a spray for this step and used two coats. Make sure you do this in a well ventilated area—it can get a bit stinky! Let dry completely.

painted barstools 2

We’re happy to finally have somewhere to sit!

Beach Baby Nursery

You guys! I can’t wait to share with you this adorable beach baby nursery that a way-back friend of mine, Jordan, created for her soon to arrive beach bum baby. This baby boy nursery captures her love for her baby and the beach beautifully.

My most favorite part of Jordan’s nursery is this Komar Wall Mural, which she found at Lowe’s.

Komar Wall Mural

How cool is that? Komar has a lot of really cool wall mural/wallpaper to check out. Check out this whitewashed wall mural by Komar.  I love the texture that this wall brings to her room. Does it not look like the real deal? When she posted a picture of this wall on Facebook, I was positive that she had her crew of family nailing planks on the wall.

plank wall

What I love about this nursery is that it carries out a theme without feeling like it was purchased in one fell swoop at Babies “R” Us. This is probably because it was not. Jordan’s nursery is full of gifts and crafts from family members and friends. It take a village to raise a child and put together a nursery.

Look at these handmade pieces in her baby’s nursery:

beach boy nursery sign


Beach boy nursery Shellbeach boy nursery sign 2


The shadowbox frame is from Jordan’s mother-in-law, who found these shells at various beaches.

I also  enjoy the new trend of an open closet especially for a nursery. It’s a smart use of space for a small room. I love the weathered looking crates and look how organized that closet is! I wish my closets looked like that.

closet Thanks, Jordan for letting me share your nursery– it’s too cute! And most of all, congratulations!

Jute Cross Wall Art

In the weeks leading up to Easter, I’d wanted to make something that showcased a cross. It’s always nice to have a few Easter-specific decorations to add to the overall spring décor.

I’ve liked the look of the nail art that took Pinterest by storm earlier this year. You’ve probably seen it; usually it’s a state outline such as this one. Given its materials, to me, this would be the perfect means for my Easter cross.

I chose to work with jute for this project (I’ve got tons left over from my wrapped Easter eggs). I’m sure you could use twine, yarn, or string as well.

Jute Cross

What you need:

Wood- we have plenty of remnants from which to choose

Fine grit sandpaper

Circular Saw- if you need to cut your wood

Stain or paint

Stain rag or paintbrush

Clear finish- I used some that we had on hand

Nails

Hammer

Jute


Step 1:

Using a circular saw cut your wood down to the size/shape you want it to be. I settled on a good old fashioned rectangle. This will be leaning against a wall on a shelf, so I didn’t make it that large, only 10.5 x 13. Give your wood a quick sand to ensure there are no jagged pieces anywhere.

Step 2:

Stain or paint your wood. I wanted to keep the natural look of the wood so I decided on stain. I’ve used Minwax before and was happy with the results—this time I went with the color Provincial. Follow the directions on your stain can to make sure you use the correct procedure. After your stain dries, apply a coat of finish. Let dry completely- I decided to let it dry overnight and pick up with the rest of the project the next day.

Step 3:

I did a quick sketch of my cross on paper so I could choose the shape/size I wanted it to be. I also made sure to decide on where I wanted my nails to go. I settled with only doing nails in the corners of the cross—quite different from the state nail art that uses tons of nails.

Step 4:

Lay your sketch on top of your wood. You could just hammer in your nails where you want them to go, and when finished, tear away your paper. However, I chose to use an awl to mark where my nails would go. I then took off the paper and got to hammering. Remember not to nail them all the way down—you need to have nail exposed to wrap the jute around!

jutecross photos

Step 5:

Now that you have your outline/nails in place, start wrapping. Make sure you tie a knot around your first and last nails so it doesn’t unravel. I chose to keep my wrapping to a minimum because I wanted this design to be simplistic and not too “perfect” looking.

jute cross

      I’m quite happy with how this came out. It’s a nice nod to the meaning behind the holiday.


1 12 13 14 15 16 21