For the winter, I really wanted a mercury glass or antiqued mirror for our mantle, but I couldn’t find any in a wood frame that I liked, in the size that I wanted. A few quick searches online yielded plenty of DIYs that were just the solution I needed! We used the method provided by Rustoleum.
Here’s how we made our mirror:
We bought a clear pane of glass from the hardware store– they have a few size options, and luckily one fit the bill.
When the paint is still wet, use a spray bottle to spritz vinegar onto the glass. Spray where/how much you’d like.
Blot with paper towel. Continue these steps until it is antiqued to your liking.
When dry, spraypaint with a darker color (this way the distressed parts show through darker on the front side of the mirror.) We used a brown that we had on hand.
For the frame, we simply cut pine boards to size. We created a bevel so the mirror would fit snugly inside the notch and used mirror clips to secure everything in place.
We used the Kreg Jig and wood glue to attach the boards.
Use any stain you’d like to finish it off- we used a mix of Early American and Provincial because we had some from previous projects.
I love how my magnolia leaf looks hanging on the mirror!
In this post I shared my plans for L’s big girl room in the new house. Since we moved in two months ago, we’ve been busy completing projects day and night (mostly at night after L is in bed). I thought I’d share the progress we’ve made in her big girl room so far.
We decided to use L’s nursery furniture until she’s ready for a big girl bed. The paint color on the wall is Benjamin Moore Foggy Morning. Originally, I was set on a neutral tone, but I couldn’t resist this shade of pale pink. It does have a beige undertone which makes it appear neutral in natural light. The ceiling fan came with the house. L’s pretty obsessed with the butterflies, so we are keeping it for now.
I went with vinyl decals to create an accent wall instead of painted stripes in the original plan. The white clouds were purchased from this Etsy shop. I cut out a few gold ones myself using vinyl sheets from Joann’s. I like that they aren’t uniform which created a more whimsical look and easy to install (don’t need to worry about perfectly lined up or straight).
The gray rug is the third one we purchased for the room. The graphic yellow rug in the original plan just wasn’t big enough. Her room needs a 8′ by 10′. The second rug we bought was a cushy shag rug, but it smelled terrible even after airing out for days. Upon research, I learned there are so many scary chemicals in synthetic rugs (I get paranoid about these things), so I went on a hunt for a backless wool rug (no backing means no glue which means less chemicals). I was drawn to the color and the graphic element of this rug and it was on sale. You just can’t pass up a 8′ by 10′ wool rug for $310. It doesn’t have a high pile and it’s a bit scratchy, but it doesn’t smell and hides stains well. I put a felt rug pad and an old blanket underneath for cushion and that seems to do the trick for now. I’m keeping my eyes open for a high pile, colorful, affordable wool rug.
The bookshelves are spice racks from IKEA. I’m sure you’ve seen this hack all over Pinterest. They turned out really cute and I like that they display the books’ covers so L can pick out exactly the book she wants. The reading nook is made from old sheer curtains, an embroidery hoop and some upcycled pillows.
You probably recognize the alphabet cards from L’s nursery. We decided to keep those in her room to give her a sense of familiarity in the new space. Plus she is really into pointing out letters and singing ABCs these days. Eventually I want to add a mirror and framed art to this wall.
For now I can cross off a few things on the list for L’s big girl room.
paint the walls
accent wall
new light fixture/ceiling fan
big rug
make reading nook/book shelf
new curtains
gallery wall art
closet organization build-in
night stand (in a fun color)
build-in seating for bay window
round play table
I hope to find time to complete a few more projects and give you another update in a few months. When do you tackle your DIY projects around the house?
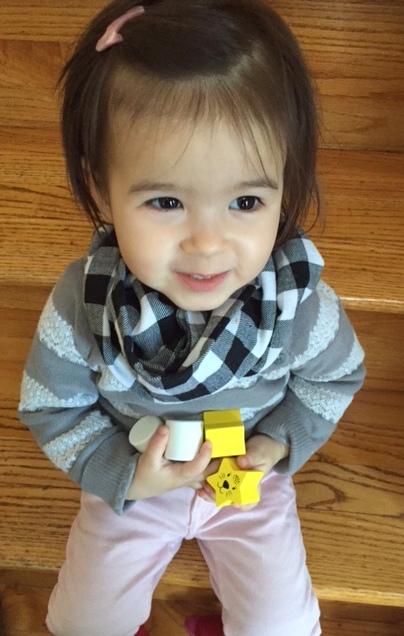
I’m a fan of scarfs. It’s an accessory that is both practical and fashionable. Over the years, I have acquired quite a collection.This winter I decided to start a collection for L by making her several infinity scarfs (because infinity scarfs are in and every 2 year old needs a scarf collection?). These are super easy and quick to sew. Add a monogram or an applique and they will make a sweet personalized gift.
Materials:
24″x48″ piece of fabric (this measurement is for a 2 year old)
matching thread
Step 1: Pin the right sides of your fabric together lengthwise then sew along the edge. If your fabric has a pattern like mine, try to match the pattern as best as you can during the pinning process.
Step 2: Turn the long rectangular tube inside out. The plaid matched much better second time around.
Step 3: Fold and pin a 0.5″ seam towards the inside of the tube. Sew the ends together right at the edge of the pinned seam. I hand stitched mine with a blind stitch. You can do this on a machine as well.
Yup, just 3 steps! I told you this is a super easy and quick project. With a few measurement adjustments you can make one for any age. I measured around L’s neck to ensure that the end product left plenty of room. If you are concerned about a choking hazard with your little one, sew the ends of the tube shut individually with a blind stitch. You can then tie the scarf with a lose knot in the back for a faux infinity scarf look.
Do you have a scarf collection? What accessories are you obsessed with?