Posts Tagged ‘paint’

Ikea Hack: Armoire Storage Upgrade, Part Two

Awhile ago I shared with you how we took an IKEA clothing armoire and added shelving to customize it to our storage needs.

We last left off with our armoire ready to be primed and painted. As this is a large piece of furniture, we used a paint sprayer for the very first time. Before we started, we had to construct a painting lair in our garage. We taped plastic drop cloths from the ceiling to the ground, making as big a square as our garage space would allow. We used the massive cardboard box that the armoire came in as temporary flooring and hoisted the armoire up onto a dolly so it could be spun around. While we did a great job with the plastic spraying den, I can’t help but think it belongs in some horror related movie or TV Show…

lair

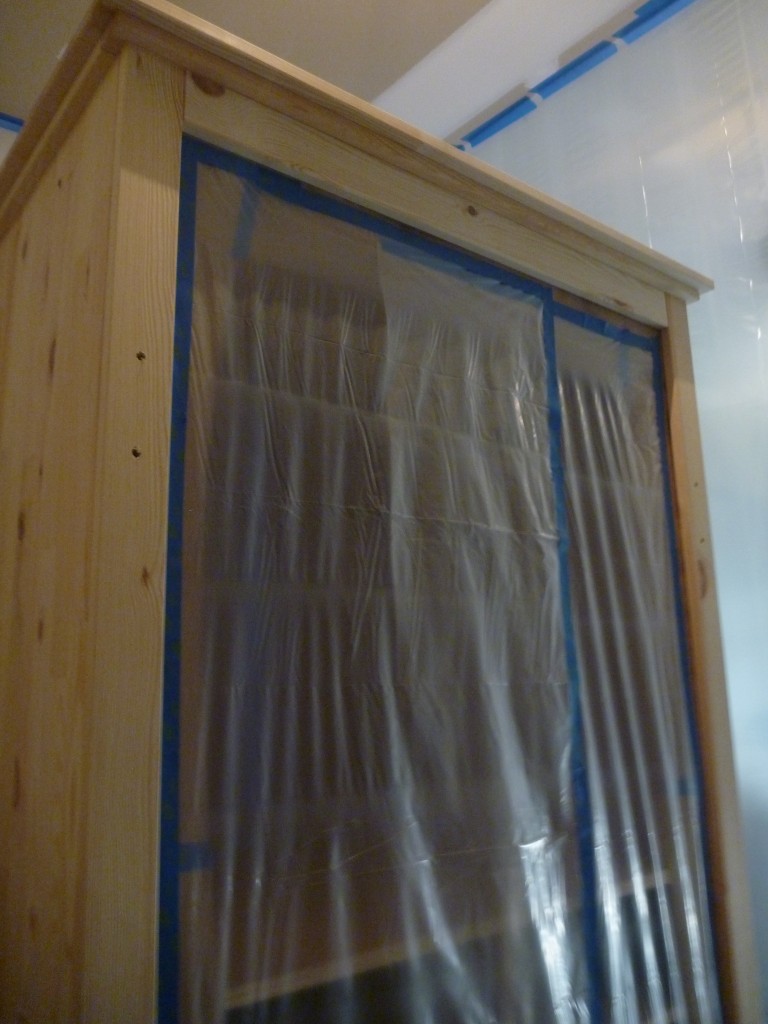
We also chose to tape up the front of the armoire/space on the back because we wanted the inside to be kept the pine color. We liked the natural look for the inside, and boy does it smell like Christmas in there.

taped up

With our prep work done, it was time to spray. For the first time, my husband became the painter in our house (I love to paint, so walls, furniture, cabinets, etc. have all been on me up to this point). Plus, the oil based primer that he chose was a no-no for me to be around. I think he looks pretty snazzy in his painting outfit—safety and cleanliness first people!

neal

We chose to prime the armoire with Sherwin Williams Fast Drying Interior/Exterior Oil Based Primer. As the piece is pine, we didn’t want the knots leaching through the paint color, so 2 coats of primer were applied. It only took my husband about 10 minutes to spray each coat of primer, with 35 minutes of dry time in between. Needless to say, he’s a big fan of the expediency of a paint sprayer.

After the primer was dry, it was time to apply the top coat. This piece is going on the first floor of our house, which has a palette of creams, blues, and greens. We could have played it safe and gone with a creamy color, but we decided to be bold for once and go with blue. We chose Sherwin Williams Moody Blue.

taken from google images

taken from Google images

After spraying 2 coats of paint, it was time to hang the freshly primed/painted doors.

Before attaching the doors, we constructed a spot to hang ribbon. We used two pieces of square shaped pine boards, some wood dowels that we cut to the width that we wanted, and curtain hooks for this.

After deciding how many ‘rows’ of ribbon holders we wanted per door and doing some quick math to make sure the layout was even, we were set to begin.

We used screws to secure the 2 pine pieces to the insides of the armoire doors. We then marked where our hooks would go and affixed those as well using smaller screws.

This was super easy and a good use of that blank door space!

ribbon joined


Here it is, my new craft space, all tucked away neatly out of sight:
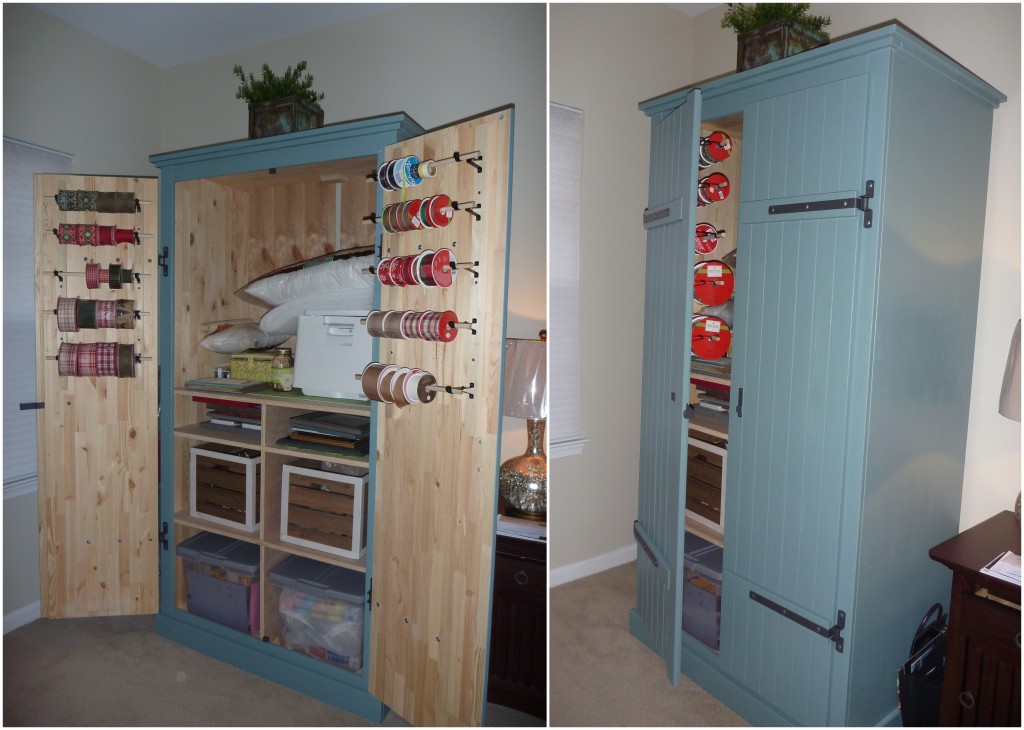
open and ajarclosed and finishedI’m sure I’ll think of other ways to customize the other nooks and crannies of the armoire, but for now I’m happy that all craft supplies are corralled in one place.

I’d love to know how you store your crafting gear!


Ikea Hack: Armoire Storage Upgrade Part One

If you have a craft room or designated area in your house, you are one lucky person. I had a corner in one of our extra bedrooms, and it was, shall we say, slowly starting to creep out of its designated corner. With my Joann bags of craft supplies starting to run amok, it was time to find a more permanent storage solution.

An armoire would give ample storage, but boy are some of those suckers expensive! I looked at some gently loved pieces that we could modify and paint, but for the existing price and work we would have to put in to refresh the piece, new seemed like the way to go.

Lo and behold IKEA had an unfinished pine wardrobe that seemed to fit the bill. Who knew IKEA sold unfinished furniture? Determined to get in and out of IKEA, we set out strictly to see the FJELL Armoire. We saw it, we loved it, we bought it.

image from ikea.com

image from ikea.com

I liked the fact it was unfinished—I wouldn’t have to fix dents, sand existing paint, etc. I also liked the style, it kind of had a barn look going for it. The only thing that would have to be modified was the interior of the cabinet. As this wasn’t going to be used as a wardrobe, we needed shelving instead of a clothes rack. An easy fix for my husband!

We first had to assemble the armoire—for anyone who has ever put together IKEA furniture, you know what this can be like. It took us almost 2 hours, but finally it was standing upright. As you can see it is a large piece of furniture, measuring 81 7/8” high, by 43 ¼” wide, by 25 ¼” deep.  

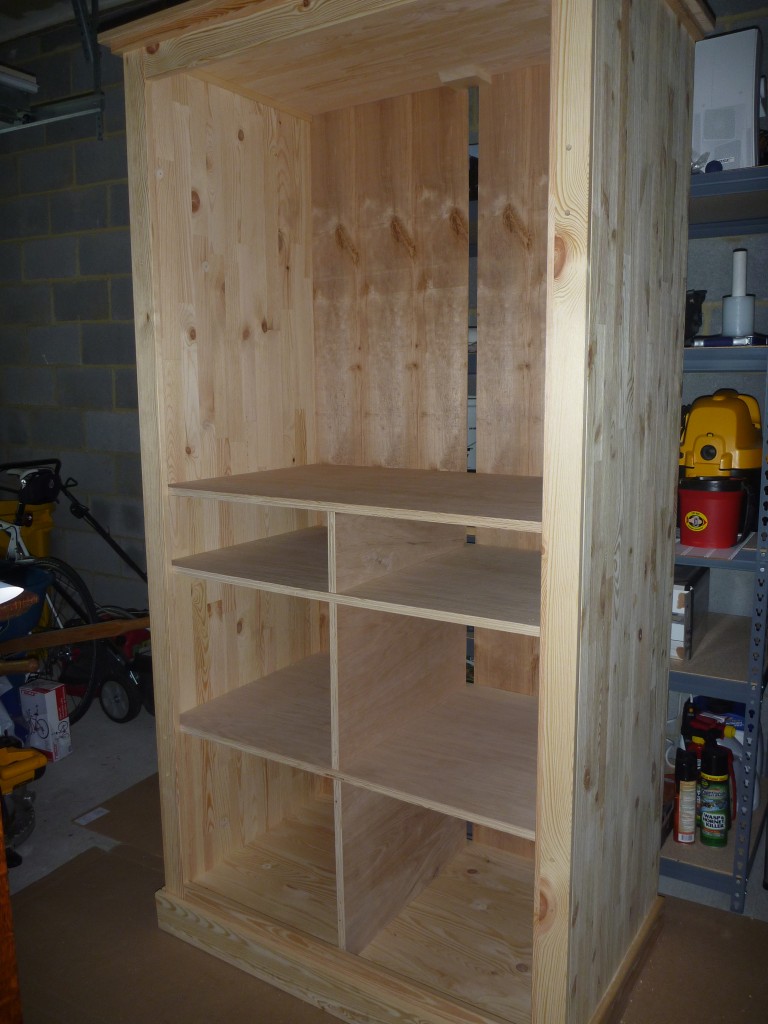
standingWe made one modification during the assembly process. We didn’t like the flimsy particleboard backing that came with the piece, so we cut down a ¼” piece of pine plywood instead. Also, we did not leave the entire back solid, as you can see in the photo below. We wanted air to circulate and also allow the possibility for electrical cords to come out of the back, should we want to put something electronic in there in the future.

cut outsNext up was the shelving. We decided that we wanted a space for 2 large Tupperware, a slightly shorter space for 2 baskets, a smaller space to serve as a catch-all for whatever, and then a shelf for my sewing machine and its components. I wanted the sewing machine shelf at as close to chest level as possible so I wouldn’t have to bend over too far to get it, or get out a chair in order to reach it.

I want to mention that before we measured or cut the wood for the shelves, I first went out and purchased the large Tupperware containers and storage baskets. I didn’t wind up using baskets at all—instead I found crates that had a barn wood look to them.

To fit my storage goodies, our shelf heights wound up at 21” from the bottom of the armoire for the lowest space, at 35” for the middle space, and at 42” for the top space.

shelvingTo construct the shelves, we used ¾” oak plywood that we already had on hand. The cubbies are not only practical, but necessary for the structural integrity of the shelves–the vertical wood will ensure that the shelf will not sag in the middle.

Starting from the bottom, we centered the vertical wood under the lowest shelf. We used two self-boring wood screws for each horizontal shelf on each side of the armoire, screwing them in from the outside of the armoire.

We then used 2 wood screws drilling through the top of each horizontal shelf into the standing vertical wood. We continued this method as we worked our way up the shelving, and those things aren’t going anywhere! The shelves are solid and ready to hold all of my crafting supplies.

We applied wood filler to the holes on the outside of the armoire and gave it a sanding. It was all ready to be primed and painted, but that’s another project for another day!

Stay tuned for Part 2 where we try our hand at using a paint sprayer for the first time!


Circles Circles on the Wall

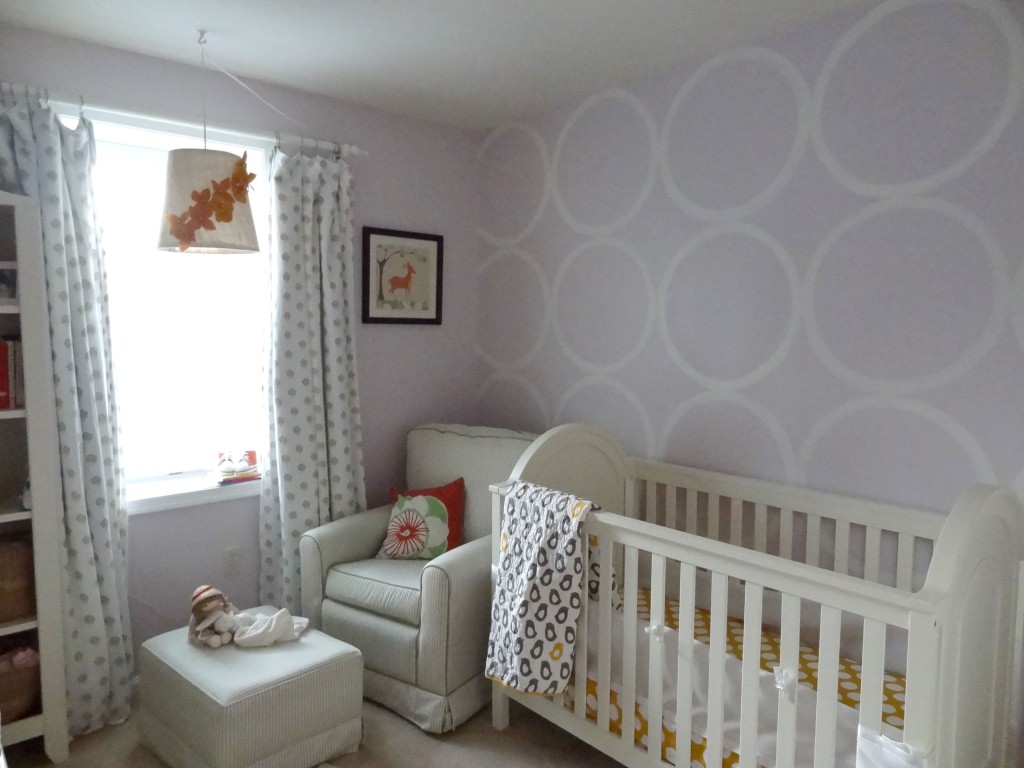
One thing I’ve learned from endless hours spent watching HGTV is that a coat of paint is the easiest, quickest and cheapest way to refresh a space. Influenced by my favorite designers Candice Olsen and Sarah Richardson (Scott Magillvrary is easy on the eyes, I mean has nice designs, too), I like to create some drama and interest in a room by using patterns. I’ve painted wide horizontal stripes in our dinning room, thin vertical stripes in the powder room and circles in L’s nursery. The first two were nothing a little painter’s tape couldn’t handle. The circle pattern, however, proved to be a bit of a thinker, especially when I had the pregnancy fog.

I thought I would share how I created the graphic circle pattern.

DSC00409

Step 1: I hunted down some tools. A piece of string and two pencils will do the trick but conveniently I had a giant safety compass and chalk on hand. The perks of my job!

IMG_3523

Step 2: I measured the length and width of the wall and decided on the radius of the circles. Since I wanted a more graphic look, I needed the circles to be fairly large. I did some division using the length of the wall and went with 22 inches as the diameter (11 inches as the radius).

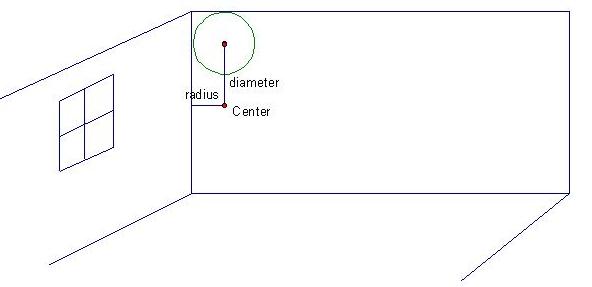
Step 3: I drew all of the outer circles starting from the upper left corner of the wall. Using the length of the radius, I measured 11 inches from the ceiling down and side in. The intersection point was the center of my first circle. I placed the center of my compass there and drew the circle.

circle step 1

For the second circle, I measured 22 inches down from the center of the first circle and 11 inches in from the wall. I marked that point then drew a circle. I repeated this process all the down to the bottom of the wall. The circles on the very bottom did not go all the way around. I didn’t mind since they were covered by furniture anyway.

paintcirlce3

I started the second column by measuring 22 inches (length of the diameter) to the right of the center of  first column, marked the center then drew the next circle. Things after this point were pretty systematic. It didn’t take long before all the outer circles were complete.

circle step 3

Step 4: This was the easy part. Using the already marked centers, I drew the inner circles. I made the radius of the inner circles 2 inches shorter creating a band between the circles.

circle step 4

Step 5: I painted the space between the outer and inner circles with a small paint brush. Whenever I “colored outside of the lines”, I used a little wall paint to fix the spot.

Nursery1

There are probably more efficient ways to create this patten, but this approach worked for me. Have you painted any patterns? Or are you thinking of creating a pattern on your wall? Share your projects and ideas with us. We’d happy to help you figure out the math too.